
Finishing the trim!

The hot tub- our best investment yet.

The ill-fated "looks like cream on the tiny color swath, turns to mint green in sunlight"- we'll be re-painting this one.


 Our garage doors got held up a bit, they were supposed to arrive last Tuesday, now we are crossing our fingers for this Thursday. The exterior lights are in and the sheetrock pile is staying mostly dry.
 As you come in the garage door you are greeted by my oh-so-well organized shop (ok not yet but it is better than it was!)
 The sheet rock on the walls of the main entryway is done. The v-match ceiling and some mud and tape and we'll be on to tile in the entryway.
 Next along the north wall is the guest bedroom. This area had been the table saw staging place for a while now and will continue to be until the shop is cleared out a bit better.
 Upstairs we have been putting down 2x8 v-match knotty pine floors. The bedroom, closet/laundry, and office are all down. The will be sanded and stained and polyurethaned once we get things a bit more settled upstairs.
 Here the view is from the end of the closet laundry where the washer will sit. You are looking through the closet arch, into the hall and then into the master bathroom.
 We decided that a nice octagonal window looking out from our closet would be just the thing, so here it is! (it will look a bit better with some sheetrock and trim.)
 The solar hot water system, visible on the eastern part of the roof, was finished on Christmas eve.
 The hot tub was installed back in November. It is accessed from the greenhouse door and is sitting on a little platform atop the ubiquitous ledge. Installing the hot tub early was the best decision we have made in the entire house building process. It is wonderful to be able to step back and soak away the stress of building decisions.
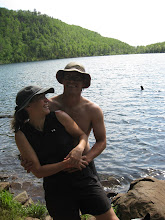
 And finally, Lorien and I did a bit of hiking up at Moxie Falls in Caratunk, ME yesterday and found the falls half frozen, pretty sweet.
 We finished the stone work for the heater last Tuesday or so. We were left with 6+ pallets of stone in our living room when all was said and done. Rather than just taking it all back outside again I finished building our greenhouse raised beds. It is a little hard to get a good angle so you'll just have to come and visit to see them in person!
 Thinking of gardening and landscaping and whatnot we decided to do a bit of chipping this weekend with the awesomely wonderful PTO chipper that Liselle and Austin bought last summer. This thing will haul through a nearly 6" diameter log and is self-feeding. We were mostly clearing dead and downed stuff from around the road and mulching rhododendrons and lilacs we planted over the last year.
 Sweet auto-feeder don't ya know.
 The bottom door is the main door on the firebox of the great room/kitchen side. Above that is our pizza/bread oven.
 From the Southern view. The two black squares on the bottom are clean out doors.
 From the den side. The firebox is a pass through as you can see and there are 3 more clean outs on this side.
 The bench.
 From the southeast.
 The whole shebang from the kitchen/great room. We will hopefully be installing the stove pipe that will take the flue up and out the roof to make the heater usable on Wednesday.
 A view from the stairway landing. You can see the cap at 7' which we plan to read on and may need to get a cat to inhabit.
 Here is me in my highly contrived acid-safety suit... thanks Tractor Supply.
 Pine shavings are put down to absorb the water and, at that point, highly diluted acid. The masonry is sprayed down with water and then brushed with the acid mix then rinsed again.
 Here is the heater after 1 week and one small column of stone on the ground... that's probably about 1 1/2 - 2 pallets worth.
 Here is a side view of the bench being built. You can see the flue tiles running through what is to be the bench (should be nice and toasty!)
 The heater from the south. The blue squares are clean outs taped with painters tape to keep from junking them up with mortar.
 We converted our soon to be greenhouse into a room for the diamond wet saw.
 And here is me using a beefy chainsaw-esque diamond saw! It is amazing how this thing goes through stone. It also pulls pretty hard so it doesn't hurt to brace your arm against a leg for balance.
 Aside from a couple of token stones from trip all of the stone in the walls of our heater came off of our land. It was important to us that the heater looked like it belonged. Unfortunately we were unable to find any suitable bench or cap stones on our place. So we searched around Augusta, Waterville, Belgrade and finally found some good stock in Jefferson. I'm standing in front of what we eventually made our bench out of. A 9' by 4' by 3" piece of stone from up near Moscow, ME. I don't know exactly what the rock is, hopefully Liselle can tell me more when she comes to visit.
 Even when cut down to bench size (7' x 2' or so) the single stone weighed more than 700 lbs. We brought it in to the house on a set of 3 hardwood rollers (one of which is visible below the near corner of the bench.) Once the stone was in position we levered it up one side at a time building stacks of wood higher and higher until we reached the bench height. At which point we mortared up the bed, rolled the huge stone into place, removed the roller and we had a bench!
 The bench is securely in place. The blue door below is the ash box and air intake for firing the heater.